[sam id=2 codes='false']
[sam id=12 codes='false']

|
THREAD TENSION
|
|
| Thread tension is something that should be discussed. This is how hard you pull on the thread after passing the needle through a bead that is already attached to the piece you are working on. It can be very frustrating to a new bead artist. The only way to learn it is by trial and error. Most likely, your first piece won’t look like you want it to because it is either too tight or too loose. Stick with it. Thread tension is something that is developed over time and requires patience. Just keep at it. Remember that the tension for each piece is different. |
|
|
STARTING
|
| STEP 1:
Pick up a bead on the needle. Bring the bead down the thread, leaving 6-8 inches of thread as a tail. Bring the needle up through the bottom or tail end of the bead. When doing this, DO NOT split the thread as it will be removed later (in Step 2). It is important not to split the thread unless needed, anyway. This first bead will be your anchor bead. Continue with the stitch. |
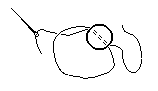 |
| Figure 1.7.1 |
|
| STEP 2:
When you are an inch or so into the piece, take another needle and pull on the outer thread of your anchor bead. The thread should slip right out. If not, keep practicing and continue on with the next step as if the thread had slipped out easily. |
 |
| Figure 1.7.2 |
|
| STEP 3:
Thread the tail end of the thread you just pulled out onto a needle that is smaller than the one you were using when you started. |
 |
| Figure 1.7.3 |
|
| STEP 4:
Pass the needle back up the piece through one or more beads at a time. Then change directions so that the thread zig-zags back through your work. Complete this action five or six times, then cut the thread close to the bead it is emerging from. |
 |
| Figure 1.7.4 |
|
|
|
|
FINISHING
|
| STEP 1:
Finishing involves virtually the same process as Starting. This is really the best method of starting and finishing because there are no unsightly burned ends or knots and the piece can find its own natural tension since there are no balls or knots pulling on the first and last beads.
After you have strung the last bead of the stitch, you will have a length of thread emerging from the last bead, still on the needle. |
 |
| Figure 1.8.1 |
|
| STEP 2:
Pass the needle back up the piece through one or more beads at a time. Then change directions so that the thread zig-zags back through your work. Complete this action five or six times, then cut the thread close to the bead it is emerging from. |
 |
| Figure 1.8.2 |
|
|
|
|
ADDING NEW THREAD
|
| STEP 1:
This is another handy technique which utilizes the same zig-zag technique described in the Starting and Finishing sections.
Stop beading when you get down to about six inches of thread. Cut another length of thread. If you have more than one needle, use a second needle with the new piece of thread. If you are down to your last needle you can use the same one but you will have to rethread it more often. |
| STEP 2:
Starting at the point where the current thread is emerging from the piece, work your way back through the completed portion of the piece with the new needle and thread using the zig-zag method described in the Starting and Finishing sections. Be sure to leave a long tail as it will become the new thread. |
 |
| Figure 1.9.2 |
|
| STEP 3:
Continue working the stitch with the new needle and thread. Work an inch or so, then pick up the old needle and thread. |
 |
| Figure 1.9.3 |
|
| STEP 4:
Now work in a zig-zag fashion through the new portion of the piece with the old needle and thread. This also helps strengthen your piece. Now, cut the old thread as close to the bead as possible. |
 |
| Figure 1.9.4 |
|
|
Return to Table of Contents